the simplicity and versatility of a spud

In light of the holidays and the massive amount of potatoes I’ve consumed thus far, this post is an ode to one of the most versatile vegetables we find on our plates, the spud.

The potato is a tuber native to the America’s and a member of the nightshade family. It was first cultivated some 4000-5000 years ago deep in the mountainous terrain of Peru and has grown to include tens of thousands of varieties. It is also the forth largest food crop in the world after the other well known starches on our dinner plates, rice, wheat & corn.

These lovely delights can be prepared in any manner one can imagine. Just think Bubba Gump and you can get an idea of how many different ways you can cook a potato. In fact, if you really want some fantastic recipe ideas for potatoes check out one of my favorite blogs http://www.thedailyspud.com/, where everything form latkes to cocktails made from potato liquor (yup, that’d be vodka my friends) can be found.
With about 15 pounds of potatoes remaining after the Thanksgiving holiday feast, I thought it was about time to get creative with the leftovers. A potato pie sounds strangely too starchy, but I was amazed how this turned out. Buttery crust, filled with a (savory) custard of creamy mashed potato & caramelized onion gravy, topped with browned crispy slices of potato. Perfect with a plate of mixed greens dressed with a tangy vinaigrette, another brunch pleaser or light dinner.

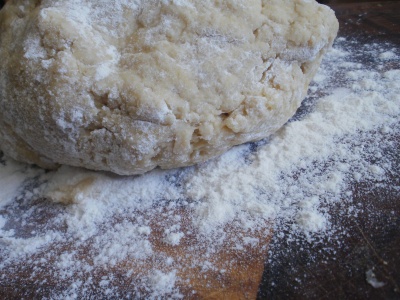
a simple buttery crust to start
after many foiled attempts at baking pie,
I finally remembered to weigh down the pie dough with uncooked beans
i love dimples
Savory custard? yes indeed! With about 2 C left over mashed potato’s I combined 1/2 C caramelized onions, 3/4 C brown gravy and 3 eggs. Added to the pre-baked pie shell and set aside while 2-3 whole uncooked potatoes are peeled and sliced on a mandoline. The sliced potatoes are then arranged in an overlapping mosaic, brushed with melted butter, salted and placed in a 375 degree oven until browned. This took about 40-45 minutes.
filled with a potato & caramelized onion custard
beautifully layered with thin slices of potato
dont forget the butter!
 After some down time in the hot oven…Voila! 
brown, crispy goodness!

slice of comfort food heaven!
This delicious pie ended up being a slice of comfort food with all the attributes we love about potato wrapped up in one. The filling was creamy and swimming with the caramelized, beefy flavors of the onion and brown gravy, topped with perfectly crispy potato crust, mmmmmmm! The creamy inside had a croquette texture, just slightly softer which went nicely with with buttery crust. Each bite was as if I had just piled mashed potatoes on a delicious biscuit. A nice combo. 
I took a chance at trying something adventurous and was not surprised with the results, mainly because potatoes are difficult to mess up. Potatoes have gotten a bad wrap in recent years, being cut from diets for their starchy ways, but I refuse to leave them out of my life. Cost, versatility and comfort make this tuber a staple and writing this I’m thinking of the myriad of potato dishes that are possible for tonight’s dinner.

3 Comments

Filed under caramelized onion, caramelized onion gravy, left overs, potato, savory pie

cinnamon rolls
warm delicious cinnamon rolls
Its difficult not to love a fresh homemade cinnamonroll. Because of the holidays, baking goods have been on sale at the market andthe weather has just beckoned comfort food. For me, that means baked bread anddesserts. I try to bake a loaf of bread every day, but over the weekend I saw apost on a delicious blog, Honey and Butter and I just could resistusing her recipe. You can find the fail safe recipe here.
I diddo a little tweeking, I used regular milk and sour cream in place of thebuttermilk, merely because I forgot to pick some up at the market. The doughafter needing was left to rise for about 3 hours (I actually forgot). Whichworked out well, it allow the rolls to because fluffy and soft. Try these witha tall glass of cold milk or a cup of joe, they’ll warm your soul!

basic sweet yeast dough
needed for about 18 minutes
generously slather butter
sprinkle with cinnamon 
and brown sugar
after the 1st rise
 the dough is rolled out

lay on its seam
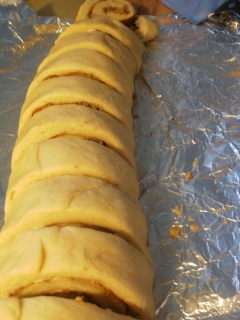
and gently cut into 
slices
gently roll

place into a baking tin

allow to rise a 2nd time 
for about 45 min
preheat your oven to 350


bake for about 22-25 minutes


douseliberally with icing
bestthing to have on a sunday morning

2 Comments

Filed under Uncategorized

hot chocolate and homemade marshmallows


hot chocolate and homemade marshmallows
Today warranted a bit of comfort. Cool & dreary, fall at it’s finest, I needed something to break the grey monotony that plagued this day and prepare myself for the chilly sea whipped bike ride to work that awaited me.

I had a bit of whole cream left from some recipe attempt this week and decided to make quick use of it before it became a relic in my fridge harboring mean curds. It came to about 3/4 C and was combined with 3 C of milk, and heated over a medium flame.


In a separate bowl 1/3 C cocoa, and 1/3 C sugar were mixed together and slowly stirred with the warming milk mixture from the stove. This is just to avoid cocoa clumps, the result is a silky smooth, super rich chocolate syrup and can go directly back into the remaining milk mixture (Its kind of like tempering). Heat until you see it steaming and remove from flame. 

Add marshmallows….
(next post will be complete step by step marshmallow making post, now that I now how to do it, I can make it look good)


make sure to have extra marshmallows


dreamy…this makes everything pretty okay.

enjoy!

5 Comments

Filed under homemade marshmallows, hot chocolate

a delicious savory sweet dessert…


olive rosemary french toast


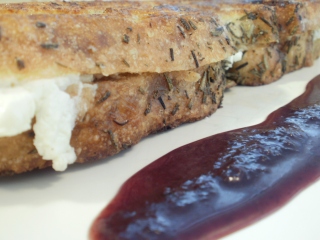
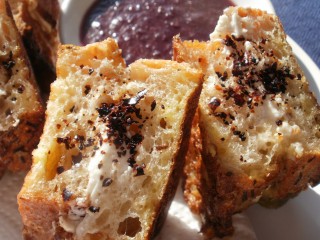
Olive rosemary French toast stuffed with goat cheese, served with kalamata honey

Another brilliant creation! This dish also brought to you by…


If you don’t know Kitchen Play already, you should check out their site and all the fabulous goodies you can win by taking part in their Progressive Party menus, http://kitchen-play.com/. Each month a different sponsor is featured providing product or tool to 6 preselected food bloggers who create a different dish of a 6 course menu. Then as inspired foodies, we recreate the dishes with our own spin. This month’s sponsor is Lindsay Olives, and so every dish (including dessert) has olives in it. Check out their website for other tasty ideas http://www.lindsayolives.com/

This dish is an adaptation of Lana’s recipe at Never Enough Thyme, she truly pulled the brilliant card out for creating a dessert with olives in it, inspiring! Check out her amazing and delicious post at http://www.lanascooking.com/2010/11/01/olive-rosemary-french-toast/

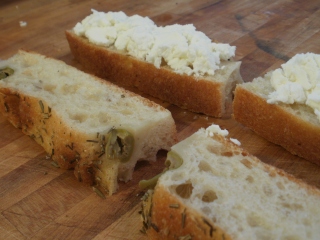
The moment I saw that a dessert with olives was possible, i used my love of all things cheese jump in and play a part. The addition of a creamy, tart goat cheese harmoniously pairs with the bittersweetness of the kalamata honey. This ended up with all the flavors of a cheese plate wrapped up in a tasty french toast snack.
Start with a fresh 
loaf of bread
slice

trim and cut the
slices in half

The bread can be baked fresh, but I was lacking one vital ingredient, yeast plus time was not on my side. So a thrifty loaf from Trader Joe’s  did the trick. 

I prepared the french toast two ways, as one long sandwich in the shape of a ficelle and as dippers (short squat finger food). Having both as serving options opens up the versatility of the dish, you can serve plated after dinner or on a tray at a brunch potluck. 
  
top with the goat cheese
sandwich 
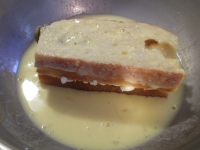
After layering the goat cheese on the bread, soak in an egg wash (I used 2 eggs and 1 Tbsp of cream, but left out the cinnamon, because I thought it might clash with the already present rosemary). 

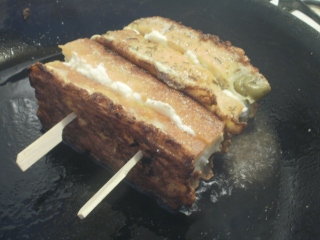
Place in a hot buttered pan. Because the french toast turned out to be so tall, the sides had an equal amount of surface area as the tops and bottoms. So two large wooden picks skewered the sandwiches together so they wouldn’t fall open and they were turned on their sides to brown.

in order to brown the tall sides
use toothpicks to hold together
so that they can lay on their side
soak in egg wash


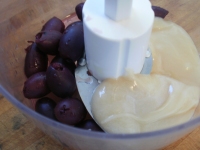
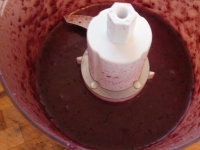
For the kalamata honey I merely pulsed 1/2 C of Lindsay Kalamata Olives with 1/3 C creamed honey. The color of this honey went from pale foamy champagne to a dynamic sultry burgundy.

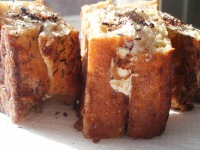
I first sliced the hot french toast on a bias, placed the pieces on paper towels, dusted with black olive salt and served along side the kalamata honey. Can you say addictive? Yes, very much so. Brunch staple from now one? Oh I think yes!


It always fun to find a recipe for an adventurous dish and it turn out to be a success. A traditionally sweet breakfast treat turned into a grown up dessert.

Kalamata olives & 
creamed honey 
pulse


french toast dippers with kalamata honey and black olive salt
Thanks again to Lana at Not Enough Thyme for the awesome idea!
delicious!
black olive salt is a great addition
But that wasn’t the only way to plate this dish. With the dippers, I had soaked the sandwiches in the egg wash, which resulted in a soft, almost spongy (very french toast) quality. For the second plating, I decided not the cut the sandwiches in half or liberally soak them in the egg. This time they were quickly dip, so lightly coated with egg and seared in the same buttered pan. The result, a crispier dessert!

Spoon olive honey onto plate


crispy goodness!

  This was a fantastic dish and was an immense amount of fun to eat, I highly recommend giving it a try! 
Enjoy!
Check back soon, I’ll be attempting my first marshmallow recipe.

4 Comments

Filed under dessert brunch, french toast, goat cheese, green olive, honey, kalamata olives, rosemary

squash puttanesca cruda

squash puttanesca cruda
It’s that time again! To embark on a few dishes from the fabulous menu at http://kitchen-play.com/, sponsored this month by http://www.lindsayolives.com/. This is an adaptation of Joan’s recipe at Foodalogue.com, you can check out her post at http://foodalogue.com/2010/11/squash-putanesca-cruda-a-salad.html . She brilliantly chose to you spaghetti squash in her recipe, absolutely delicious! 
Thanks to Kitchen Play’s Progressive Party menus, I was one of the proud recipients of last months 6 prizes! A fun site for food bloggers with a number of exciting challenges with chances to win cool prizes and money. This month’s sponsor, Lindsay Olive’s, are a 100 year old California family business producing high quality, delicious olives in the sunny central part of the state.


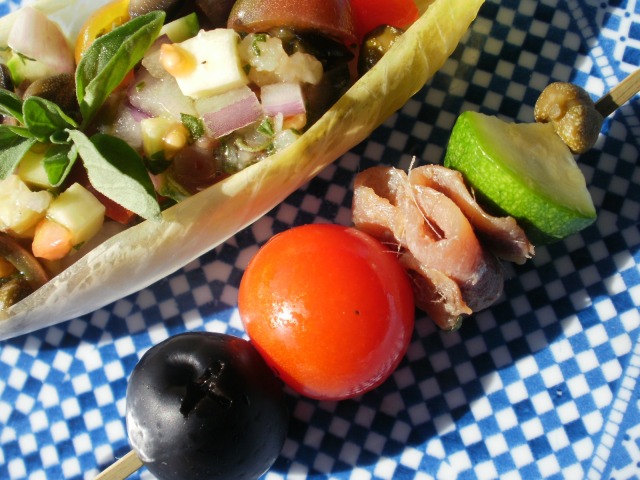
This is a fantastic salad that was a breeze to put together. Depending on your preference, you can use any kind of green as your accompanying lettuce. I started by filling endive spears but i find out of season endive a bit bitter so I ended up using tender bibb lettuce. Both make great receptacles for the chunky puttanesca, but this is so good, you don’t even need lettuce.

Classically a puttanesca sauce, (literal translation worthless/garbage or aka whore), contains tomato, olives, capers, anchovy, oregano, onion and chili flake and traditionally the sauce is simmered then tossed with pasta. Historians claim it was invented near Naples in a late night scramble to serve guests in a restaurant in the 1950’s. The cook only had a few basic ingredients left in the pantry and threw this together, later putting it on the menu.

For this recipe, we are incorporating these same ingredients into a raw salad. The term cruda is the feminine form of crudo, which in terms of food indicates raw or uncooked. I’ve always associated crudo with raw fish marinated with citrus and olive oil, but the term can be applied in any regard, with vegetables and/or protein. 

the ingredients
tomato, caper, onion, olives, anchovy, summer squash
small diced
Creating an uncooked version of this dish, I had to incorporate the ingredients in a slightly modified way. The two cloves of crushed garlic, 1/2 tsp chili flake, and 1 Tbsp oregano naturally become part of the vinaigrette. To these ingredients olive oil and red wine vinegar are added, making about 2-3 Tbsp of dressing (in a ratio of your liking). I tend to use a higher amount of olive oil as too much vinegar might drown out the raw freshness of the vegetables. And because there is no heat or cooking applied, I used a bit less garlic than usual. Putting it through a garlic press, reduced the final amount to only about 2 tspn. 
garlic, fresh oregano, chili flake, olive oil, red wine vinegar
toss ingredients together
The salad ingredients include 1 C tomato, 1 fresh (uncooked) summer squash, 1/4 of a red onion, 3 anchovy fillets and 1/2 C Lindsay black olives, all chopped to a small dice. Add 2 Tbsp of capers then combine with the vinaigrette. Toss thoroughly and set aside while you clean and dry your lettuces.
I thought it fun to serve this tangy, savory crudo in self contained vessel. Endive are perfect for this dish, using the versatile, sturdy leaves as boats, they can stand up to any hearty filling. Though sometime it can be bitter, using the tender leaves of a bibb lettuce can be an alternative.
serve as a dinner salad…
…or as a brunch/ midday snack
The flavors of this salad are bright, tangy, briny and fantastic. Garnish with fresh oregano but don’t season with salt until you taste the crudo mixture, the anchovy, caper and olives all provide a good amount of salt on their own. The zucchini provided a great crunch to the salad as did the red onion. This was so tasty that I could see it spooned on top an omelet, used as a topping on bruschetta or as an accoutrement for a whole baked fish. As a garnish, I speared all the main components which turned into a great amuse bouche or passed appetizer. 
flavor party! I ended up eating all 6 spears after the salad

If you liked this post, don’t forget to check out the Progressive Party menu at http://kitchen-play.com/. This months menu was brought to you by the lovely folks at http://www.lindsayolives.com/.
Check back in a couple of days, I’ll be writing about Olive/ Rosemary French Toast Sandwiches with goat cheese and black olive honey!!

2 Comments

Filed under anchovy, caper, olive, puttanesca, salad, squash

jager schnitzel von schwein

deliciously crispy pork jager schnitzle with braised apples, cabbage & onion
           Theres something inherently comforting with things that are breaded and fried. This is my go to dish at least once a week. Commonly known as Schnitzel around the world, it is classically made with veal but can also be made with pork. Usually I serve this thin breaded chop milanesa style with fresh heirloom tomato and lemon dressed arugula. I’ve stuffed it Saltimboca style with proscuitto, sage and shaved parmesan too. It can be served Austrian style with just a lemon wedge or with a rich earthy mushroom sauce (Jager Schnitzel von Schwein). Versatile and super easy, this dish would be great with anything topped or served aside it. Other ideas…potato salad, sauerkraut, japanese curry, the list is endless.
          In recipe searches I found jager or mushroom sauce could be beef based or milk. I prefer the thicker dark brown sauce over the milk based one, but if you gave me a pint of buttermilk I would happily turn this into a southern rendition of chicken fried “pork” steak with cream gravy. I’ve tried this Standard Breading Procedure (SBP) out on other cuts of meat (chicken cutlets, cube steak) and found that with pork, i’ve had the most success with the breading staying on the cut of meat. I prefer a buttermilk and a double flour dredge for chicken and beef.
         Prep all your sauce and side dishes before hand so that when the pork is finished you can plate it up immediately. 
Pork Cutlet Preparation:
Start with a boneless pork chop, butterfly and pound thin

so thin, it’s like stained glass if held up to the light


dust with flour

dredge in egg

dredge in panko bread crumbs

Jager (Brown Mushroom) Sauce Prep:
into a hot skillet (with ample oil)
crisp until golden (6-7 minutes on each side)
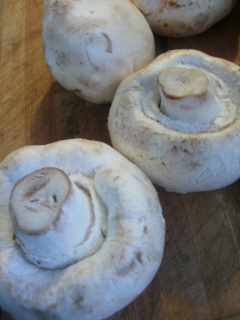
start with fresh mushrooms
clean with a damp paper towel

make sure your caps are closed (no gills showing)

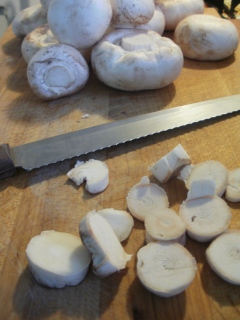
trim starchy stems off

rough chop your trimmed mushrooms

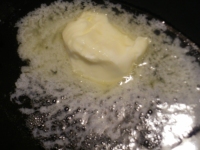
melt some butter

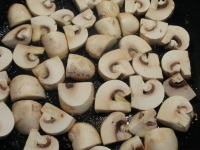
add your mushrooms in batches
dont touch! let them brown
at least 7 minutes each side

beautifully golden mushrooms!
jager (brown mushroom) sauce
The sauce is simple and straight forward. Depending on what you have in your pantry you can use beef stock or bouillon cubes. For every one pound of mushrooms that is seared, add two cups of liquid. Bring to a boil and thicken with a cold corn starch slurry to your desired consistency. Set aside. 
           Once you’ve decided to go the breaded meat route, choosing your sides and toppings is the difficult part.  We have a eclectic local restaurant that serves up tasty Austrian/ Dutch and Belgian fare and someone made mention of their Jager Schnitzel, which is by far one of the best I’ve ever had. Hence the Germanic leanings in my side dish and sauce, I had a craving.
          With apples in abundance and a half head of cabbage in the ice box, a delicious tart and bacony braised side dish warranted some execution.
Braised Apples and Cabbage:
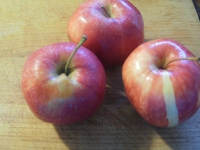
baby apples, one with a gold stripe
from top to bottom
peeled apples

cored and sliced apple

roughly slice the cabbage
Start by browning thick cut pieces of bacon in a hot pan. Once the bacon becomes a golden brown, pour off most of the bacon grease and add the apples, onions and cabbage. After a couple of minutes softening, add 1 Tablespoon of apple cider vinegar, 1/2 cup of stock or water and a liberal dash of salt. Allow the vegetables to cook down for about 10-12 minutes. then place in a 400 degree oven for 5-7 minutes while you finish up the breaded cutlet.

Plating up dinner:

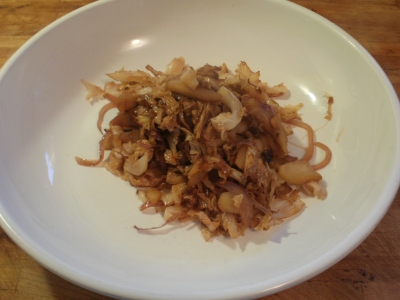
braised cabbage

finished cutlet

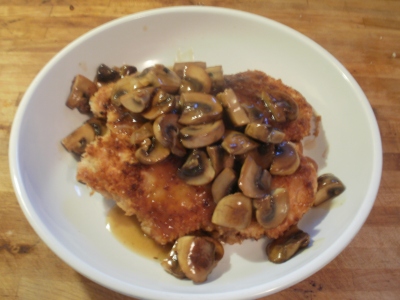
smothered in mushroomy jager goodness

yum. breaded meats at it’s Autumn best!

3 Comments

Filed under Austrian cuisine, braised cabbage, jager, mushroom, pork cutlet, Schnitzel

food shopping, a memory of Fairway.

       Yesterday I jetted off to the market right after watching the San Francisco Giants win the World Series, leaving shortly after 7pm and returning home late, after 9pm. Lately, a trip to the grocery store is a drag, from battling passive aggressive drivers in the parking lot, to mysteriously sticky carts with wobbly wheels, crowed isles, overpriced goods and long waits in line behind the only checker that doesn’t know how to process WIC coupons, to say the least..it’s a nightmare. I try to jump in and out of the market to avoid as many of these things and even with a major buy, never spend more than an hour on any one expedition. 
          It didn’t always used to be like this, I used to escape to the market, get lost in it, and dream magical nights full of gastronomical feats for hours while wandering around aimlessly. I really enjoyed shopping for food and I loved being surrounded by the endless possibilities that the market holds. But I have grown bitter and disappointed at what the local grocery chains offer and Santa Barbara sorely lacks affordable artisanal food markets. 
          Not too long ago I would find myself feeling a sense of anticipation and joy when I know i’m slated for a trip to the market. I definitely attribute this to my decade of living in New York City, but NYC doesn’t have grocery stores that most americans are used to, they’re actually quite pathetic in providing the bare essentials but more often stock a large delicious selection of Polish, Latin and Vietnamese specialty foods, depending on location. Many city residents have individual butchers, fish mongers, and farmers markets that they pick up goods from and grocery stores are left for the sundries. For foodies, living in the city means a jaunt up to the westside to Zabars or the 77th St. Fairway market or in the case of Brooklynites, this meant a trip out to Red Hook to the even larger Fairway. It’s everything, all in one place.
          The Brooklyn Fairway market jets out into the bay, with the water lapping the old pier structure the building sits upon, you can grab a coffee from the on-site bakery and sit yourself outside with a small view of the statue of liberty while wild winds whip off the water and blow you over. It’s an awesome old warehouse that holds about 4 floors of loft apartments above it and nothing but the best retail grocery store in the five boroughs on the ground floor. This building along with the surrounding ones are like all the others in the area, big red brick armory structures that have more than 200 years of history caked thick on all it’s surfaces. 
          There’s a route that everyone takes when they enter this foodie bananza, as it’s layout forces you to maze through mountains of produce right off the entrance and into the bowels of the rest of it. After one loops through produce paradise, a large deli opens to the right, the only one of which that you could order as much Imberico ham as you want at honest prices. Did I say deli? I meant mega-opulous deli with hot foods, both main courses and side dishes galore, and deli salads as much as the mind can fathom. Don’t forget your sliced meats! I’m talking charcuterie heaven! from the Imberico ham I mentioned to four kinds of proscuitto, countless salumi, lomo, lardo,… I can go on, but I won’t because straight ahead lies the most beautiful cheese counter ever to grace this side of the East River. 
          Hundreds of cheeses, all deliciously displayed, where three men in clean aprons yell toward you for your order, and where samples are liberally provided for your decision making process. Most times you can be accommodated, unless it’s an gooey triple cream that can’t be broken into because it only comes in rounds. 
          If you can move on, it’s towards the left and to the packaged deli and the olive station. Barrels of marinating bliss, of all sizes, shapes and colors, some olives are the size of walnuts and strange pickled things meant to pair perfectly with all the cheese and charcuterie beckon you to pick up a pint and just start shoveling. 
          Up ahead and onto the butcher/fish monger station. Each has one side of a 20 yard counter laden with glistening goods from both the land and the sea. All manner of cuts of beef, pork, duck,  farm raised game, foie gras, fresh sausage, and so much more! There are little pockets or side rooms containing dried goods, toiletries, and pet food. If you walk yourself past the meat and seafood counter, and move into the aisle section of the market you are first greeted with the coffee station. 
          We’re not talking a wall of self-serve, pully-lever units of stale beans, I mean a guy with a big scoop running around to 30 or so ginormous barrels of coffee beans getting you your morning blend, however much or little you want. He’s like a sommelier but for coffee, tell him what you like and he’ll get you something in any price range
          Olive oils, mustards, vinegars the world over are next, then isles of normalcy (you know, name brand cereals, pickles, pasta, sauces, bread etc). Before you head down through the dairy and frozen goods to the cashier, the large bakery sits in the back towards the water. People line up their carts in orderly rows brimming with grocery goods and leave them to stand in line for fresh coffee, a pastry and a stroll along the water before returning to finish up. 
sigh…yes, grocery shopping as bliss.     
Unfortunately I no longer live in Brooklyn or near Fairway, and my multi hour long forages into it’s depths are a distant and longing memory. Lately I’ve been in a bit of a blog posting funk, I just havn’t been happy with anything I’ve created, either how it turned out or how it looked in photos. To understand that part of what drives my passion for food I realized that shopping is a major participating factor. It probably is this way for anyone who craves to cook, the process is an important part of the experience, the shopping is essential to have that connection with that which you create. Looking back my favorite food moments were born from a fantastic market experiences, so I’ll share 
Here’s a list of my Top 5 Markets:
1. Fairway Market, Red Hook Brooklyn
2. Wegmans, Ithaca NY
3. Grand Central Market, NYC
4. Whole Foods Venice (biggest, badass WF I’ve ever seen, wine bar and all!) CA
5. Tri-County Produce, Santa Barbara CA
I’d love to hear about your fabulous market and what makes it so special to you, if I’m in the neighborhood, I’ll check it out!

2 Comments

Filed under Fairway, food, grocery, market, shopping

Gardening Day

          I hadn’t realized that it’s been nearly two weeks since my last post (I apologize!) Since the garden has long been depleted, and with inspiration lacking, life seem to steer me out of the creative kitchen for a moment. But with a flurry of fall garden activity occuring and the wrap up of Kichen_Play.com’s Inaugural menu, the next couple of days I should be busy and productive!
          It was about time to rip out the garden so the fall selection could get planted. The weather has been beautiful lately, in low 70’s with tons of fall sunshine, and it has finally stopped raining. I also kept this day off as long as possible, besides being slightly lazy I also wanted to harvest as much as I could from the remaining plants. It a strange lot, not sure what I’m going to make of all this. The large watermelon, about 11 pounds would make for fantastic carving, but my sister has become quite the canner and pickler, making delicious jams like rose watermelon and spicy thai chili jelly. hmmmmm,…what to do?As for the eggplant, I’ll most likely just make a little baba ganoush this evening and eat with house made lavash (if I’m not called into work)
the last of the summer bounty:
3 watermelons
1.5# of various chilis
6 small eggplants
the overgrown mess…ugghh!
after harvesting, the remaining plants were ripped out
slowly tilling and ripping out all the grass (the area hit by sunshine done!)
Okay so I didn’t get as far as I had hoped. It was past noon and the results for Project Food Blog had just been announced so I got deterred. Not too mention it was lunch time. I’ll bang the rest of it out tomorrow. Sunday is La Sumida Nursery day! Fall additions to the garden will include, midget carrots, tokyo turnips, multi-colored beets, broccoflower, onions and potatoes. 
Check back in the next couple of days, I’ll be posting about the final two courses for Kitchen_Play.com’s Inaugural menu, the entree (Roasted Beef with Reggiano Cream) and dessert (Pink Peppercorn Ice cream sandwiches!)

5 Comments

Filed under Uncategorized

White Bean & Rosemary Bruschetta

both caramelized white beans and a white bean spread top this bruschetta
 Appetizers are by far one of the best thing about a meal, a couple of bites and it’s done. There’s no real commitment to an appetizer, you needn’t dirty flatware or even a plate, it’s finger food at it’s finest. It’s leisurely passed on a tray at a party or it can be placed on a  buffet table and left to the holiday masses. But don’t let this free spirited course fool you, it can indeed be dressed up and served as a plated course to your guests. Elegant rustic? yes, indeed,  just my style.

This is the appetizer course of the Inaugural menu featured on http://kitchen-play.com/ and sponsored by the awesome people at http://www.surlatable.com/. Sur La Table is a foodie haven that has high quality kitchen wares for the novice or professional chef. A great place to spend an afternoon and get lost in.

Again, for this dish only bullet points in the way of ingredients were provided: 1.white bean 2.rosemary 3.bruschetta (grilled garlic toast). All the ingredients are straight forward. Bruschetta, for all intents and purposes is toast, it literally means bread that is to be “roasted over coals”. It’s always rubbed with garlic cloves and dressed with a bit of olive oil. Secondly, it’s topped with fresh chopped produce, cheese or even a country pate. Though the toppings can vary from traditional tomato, to roasted wild mushrooms and even slow roasted garlic cloves, for this course we’re using white beans.


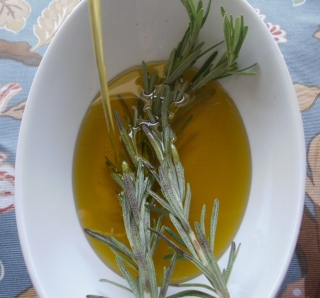
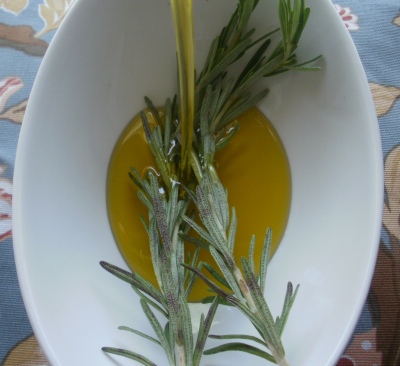
First start by heating up about a cup of good quality olive oil. Be careful not to scorch it, it shouldn’t come to smoking, just a gentle warm up. Add two to three sprigs of rosemary to a bowl and pour your heated olive oil over it. Roughly crush 2 cloves of garlic and add them to the mix. Allow the rosemary to bathe in the olive oil for a good 12-15 minutes. The warm oil will pick up the subtleties of the aromatics you add to it. This one sings the sweet smell of focaccia to me, as it’s the same oil I use when baking such delicious Italian treats. You’ll definitely have some rosemary oil left over, so start planning on other uses!


Rosemary grows like a weed here in Santa Barbara, I actually had to have a professional gardner come out and remove the gigantic rosemary bush that stood 5 feet high and spread itself equally as deep. When garnishing butters for service, we gather wild rosemary at the restaurant.

rosemary soaking in warm olive oil
ingredients
pulsed chunky spread

For 6-8 guest you need only about 12 ounces of beens. Regardless if you use fresh or canned beans, rinse and place half of them on paper towels and let dry in the sunshine. With the other half, add to a food processor. To the beans, add 1/4 of a red onion, the leaves of soaked rosemary sprigs, one of the soaked, crushed garlic cloves and just under 1/4 cup of the rosemary oil. Pulse to a semi smooth spread, you still want to know what it is so there’s no need process to oblivion, let there be chunks of white bean for a rustic feel.  

Next, take the other half of beans that you had been sun drying and place in a hot cast iron skillet, add a bit of the rosemary oil. You will definitely want to cover with a splatter screen or lid as the beans will begin to pop, reduce the heat to medium and allow to caramelize for about 6 minutes or until you see a beautiful golden beans. At the last minute add fresh chopped rosemary and a pinch of sea salt. Remove from the heat and allow to cool while you are toasting up the bread.
The best kind of bread is what ever you love, light and airy or crunchy and dense, choose a bread you like eating. Slice at a thickness you like and generously rub with a halved garlic clove and brush with a bit of the rosemary oil. Pop onto a grill or into the toaster and allow to golden crispiness.
Once your bruschetta are perfectly toasted, top with a bit of the white bean rosemary spread then spoon caramelized beans to finish it off, garnish with rosemary. eat or serve!
a beautiful array of white bean & rosemary bruschetta

quick, easy and delicious!

29 Comments

Filed under Uncategorized

Grilled & Stacked Ratatouille Salad

Theres no better way to get your family to eat a variety of vegetables than with this grilled ratatouille salad. The layered presentation alone is drool worthy and each vegetable brings a smokey, caramelized version of itself to the dish. Served room temperature and with a garlic lemon thyme vinaigrette, it includes fresh summer zucchini, patty pan squash, eggplant, sweet orange & red bell peppers, onion and heirloom tomatoes.

Ratatouille is a traditional French dish of Provence and is usually vegetables stewed or simmered in olive oil. It can be served as a side dish or appetizer, hot or cold and with bread or artisanal crackers. I find it a very  communal dish that can be placed at a picnic table or served at a holiday dinner. It satisfies your meat centric diners as well as the vegetarian ones.

This dish is the second of Kitchen Plays Inaugural six course menu that I am working through. To check out this and all the other fabulous things Kitchen Play provides to food bloggers everywhere go to http://kitchen-play.com
This dish is quite simple to pull together, it really only entails three things, slicing, grilling & stacking. I used a smaller grill, my thrifty George Foreman, so if you have an outdoor grill or a full stove top one you can reduce the cooking time by half. 
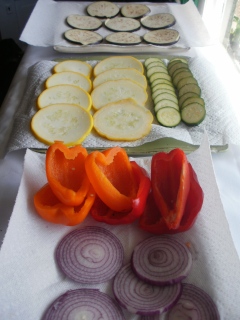
What you’ll need for this dish are some vibrant late summer vegetables. 
The bounty of colorful summer vegetables still available this time of year is astounding. Santa Barbara is definitely experiencing an Indian Summer with daily October temperatures in the 80’s. Seeing that this summer was basically nonexistent, having had the coldest summer in 77 years, we’ll take it.

Clean and trim the vegetables, then run them through a mandoline. 
I kept the thickness of each vegetable close to or just under a 1/4 inch, so that each vegetable could hold up to grilling. Nothing is worse than coming back to the grill and finding your precious dinner half burned away and half stuck to the grill because it’s integrity was compromised by being too thin. I recommend using a mandoline over a knife so you can get more uniform slices and get through all the vegetables quickly. I used my OXO Stainless Steel Mandoline from Sur La Table (http://www.surlatable.com/home.do). 
After slicing the vegetables, lay them on salted paper towels  and sprinkle with more sea salt. Allow to sit and sweat for 10-12 minutes. The salt draws out some of the bitterness associated with nightshades and sometimes seen in older squash. This is the perfect time to heat up your grill. Make sure that the surfaces are clean and then oil with canola oil.
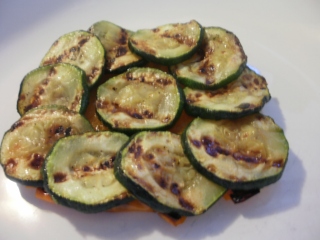
Once the vegetables have sweated, blot with paper towels to remove the excess moisture. Into a mixing bowl, add the individual vegetable with lemon thyme and olive oil, then place onto the hot grill. Surprisingly, it took about 15 minutes for each vegetable to grill to the appropriate softness. Set aside and allow to cool to room temperature while you finish grilling the rest. Do not however grill the heirloom tomatoes, they are the ideal texture as is.
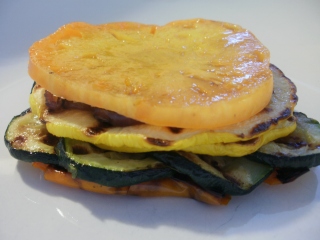
After everything is grilled, the stacking can begin! 
start with a hearty piece of orange bell pepper as your foundation
the fresh summer zucchini was the only vegetable not close in relative size as the other vegetables, but they can easily be layered in a spiral formation so to fill in the same amount of space as the other vegetables
if you didn’t have access to the wide patty pan squash, then use the yellow italian summer squash and just layer as you did with the zucchini above 
the sweet grilled onions are next 
a  stunning slice of heirloom tomato
then the eggplant
and top with a red bell pepper. Now you could stop the stacking at this point and drizzle with the vinaigrette and serve…or you can keep going! Following the same pattern as the first, layer yet another piece of each vegetable until you get…

If you wanted you could use a cylindrical mold so to avoid the leaning effect, i think it’s rustic to allow it to stand on its natural accord. The entire tower is drizzled with delicious vinaigrette whose base is your standard balsamic. One part balsamic, three parts olive oil, 2 cloves garlic crushed and two teaspoons of fresh lemon thyme. After a good mixing I actually placed the metal mixing bowl into a 400 degree oven for 2 minutes. The heat warmed the sharp bitterness out of the garlic and adds a nice warm touch to the salad.
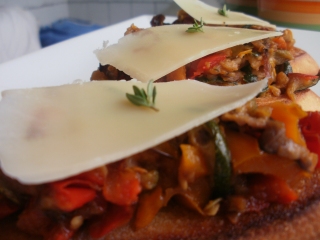
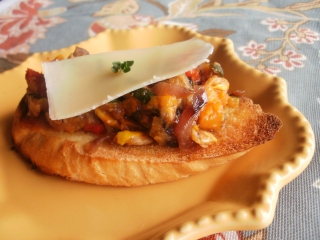
If there are left overs, chop roughly and place on toasted baguette with some parm and olive oil. If its morning time, poach an egg and place it on top and you’ve got a lovely Provencal breakfast.

19 Comments

Filed under Uncategorized